 |
| We started with 2x2 square tubing for a strong frame. |
 |
| We added larger wheels for better towing. |
 |
| Sides were cut from a 4x8 sheet of 1/4 oak plywood. |
 |
| Floor was a 1/2" sheet of plywood. |
 |
| Didn't look like much at the beginning ... |
 |
| We used a Benroy plan off the internet and made changes to suit us! |
 |
| 1x2 pine for framework. |
 | |
| Made hubby try it as it didn't look big enough to hold us! |
 |
| We used wainscoting for the inside. Great to work with to shape around the curves and a nice look in the end! |
 |
| This shows the wainscoting on the ceiling & the roof vent. |
 |
| Building the doors - "store bought" just didn't look right! |
 |
| Added a piano hinge and we're set! |
 |
| We used 1/2" sheets of styrofoam insulation. Fit & works perfectly! |
 |
| Plywood doesn't BEND well so we scored the back - just cut through one ply with a router and then pushed it down onto glue (Liquid Nails). |
 |
| Basic door handles. (NOTE: Windows slide up to open & have screens!) |
 |
| Hatch was easily the hardest part but has held up beautifully! |
 |
| Another piano hinge & we're good to go! |
 |
| Next couple pictures show the scoring on the back of the plywood! |
 |
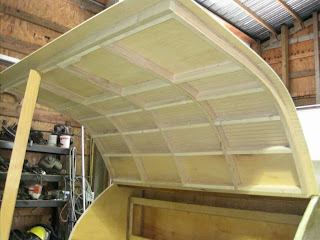
| Looking up at the inside of the hatch before we added the insulation. |


